Introduction
As winter approaches, RV enthusiasts often face the challenge of protecting their vehicle's water systems from freezing temperatures. Properly winterizing your tankless RV water heater is crucial to ensure it functions flawlessly in cold weather and remains damage-free. In this guide, we'll walk you through the essential steps to winterize a tankless RV water heater, allowing you to enjoy winter adventures with peace of mind.
 Materials Needed:
- Non-toxic RV antifreeze
- RV water pump converter kit (optional)
- Wrench
- Screwdriver
- Bucket
Step 1: Turn Off the Water Heater
Begin by turning off the tankless water heater. Locate the control panel or switch on your RV that corresponds to the water heater. This step is essential to prevent any accidental heating during the winterization process.
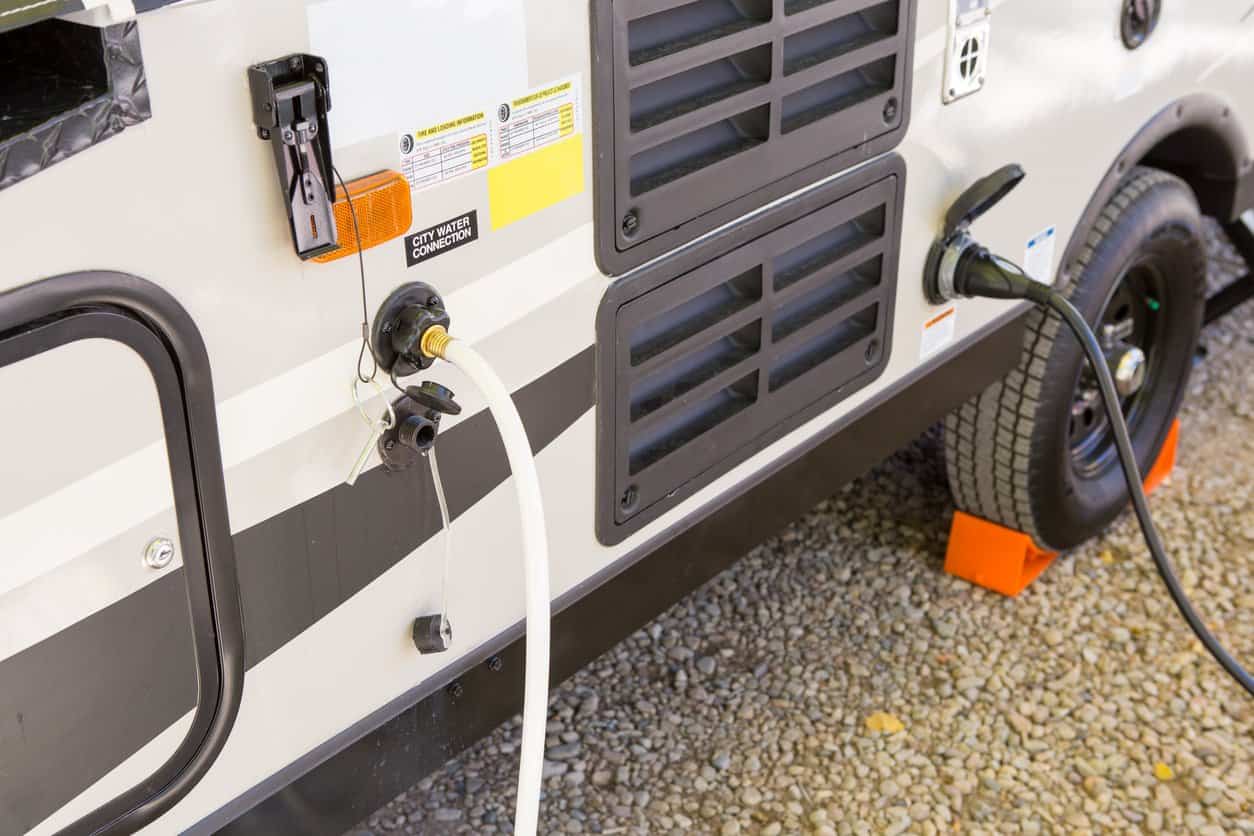
Step 2: Disconnect the Water Source
Disconnect your RV from any external water sources or hoses. Make sure there's no water flowing into the RV's plumbing system.
Step 3: Drain the Water Heater
Locate the drain plug or valve on your tankless water heater. Use a wrench or screwdriver to remove the plug or open the valve. Ensure that any residual water inside the heater is completely drained. Be cautious, as the water may be hot.
Step 4: Bypass the Water Heater
To prevent antifreeze from entering the water heater, you'll need to bypass it. Many RVs have a bypass valve that can be activated. If your RV doesn't have one, you may need to install an RV water pump converter kit, which allows you to bypass the water heater manually.
Step 5: Prepare the Antifreeze
Purchase non-toxic RV antifreeze, which is safe for your plumbing system. Pour the antifreeze into a clean bucket.
Step 6: Pump Antifreeze Through the System
Start by turning on the water pump inside your RV. Using the pump, pressurize the plumbing system with antifreeze. Begin with the faucet located farthest from the water pump and work your way toward the closest faucets. Open each faucet one at a time (hot and cold sides) until you see pink antifreeze flowing. Don't forget to include the shower, bathroom sink, and any exterior water connections.
Step 7: Flush Toilets and Sinks
Flush the toilets and run water through all sinks, ensuring that antifreeze flows through these components. If your RV has a washing machine, run antifreeze through its water lines as well.
Step 8: Check the Water Heater Bypass
Return to the tankless water heater and ensure that the bypass is still in place, preventing antifreeze from entering the heater.
Step 9: Monitor the Antifreeze Levels
Check the antifreeze levels in your RV's toilet bowl and P-traps under sinks. You should see pink antifreeze in these areas, indicating that they're properly protected from freezing.
Step 10: Secure the Drain Plug
If the tankless water heater had a drain plug, reinstall it securely. Ensure it's snug but not over-tightened to avoid damaging the threads.
Conclusion
Winterizing your tankless RV water heater is an essential part of preparing your vehicle for cold-weather adventures. By following these steps, you can ensure that your water heater and plumbing system remain free from damage due to freezing temperatures. With proper winterization, you'll be all set to enjoy cozy RV trips even in the chilliest of winters, knowing your water systems are protected and ready to serve you without any hitches.